I just wanted to do a small update on the outhouse project at our cabin in Gilmore, Idaho.
Long blog post short, it was a lot more work than I anticipated!
I had originally thought the outhouse would be completed by the 1st of June. Now it's the 23rd, and I've only managed to complete the base and dig the hole.
Why is the outhouse taking so long?
I watched a few YouTube videos of other people building outhouses in Alaska, where they have nice soft dirt that looks like sand, and they can dig the hole in one day. Up in Gilmore, Idaho, however, the ground is very rocky, which is taking a lot of time to dig the hole.
It would cost at least $400 to have an excavator dig the hole for me, but I would then need to build something to secure the sides of the hole so it won't collapse. Excavators tend to tear up everything, whereas hand tools allow for more precision with the edges.
So, I decided to save the money and just dig the hole myself, but it's taking forever. I think I've spent about 16 hours digging the hole, spread out over the course of a few days.
I still have about 4-6 hours of digging left.
I honestly thought it would only take a couple of days of digging, with maybe 8 hours spent on it in total. I was wrong.
Can you show us some photos?
Sure :) I'll be happy too haha!
Below are some photos with captions that shows the progress of the outhouse from start to finish.
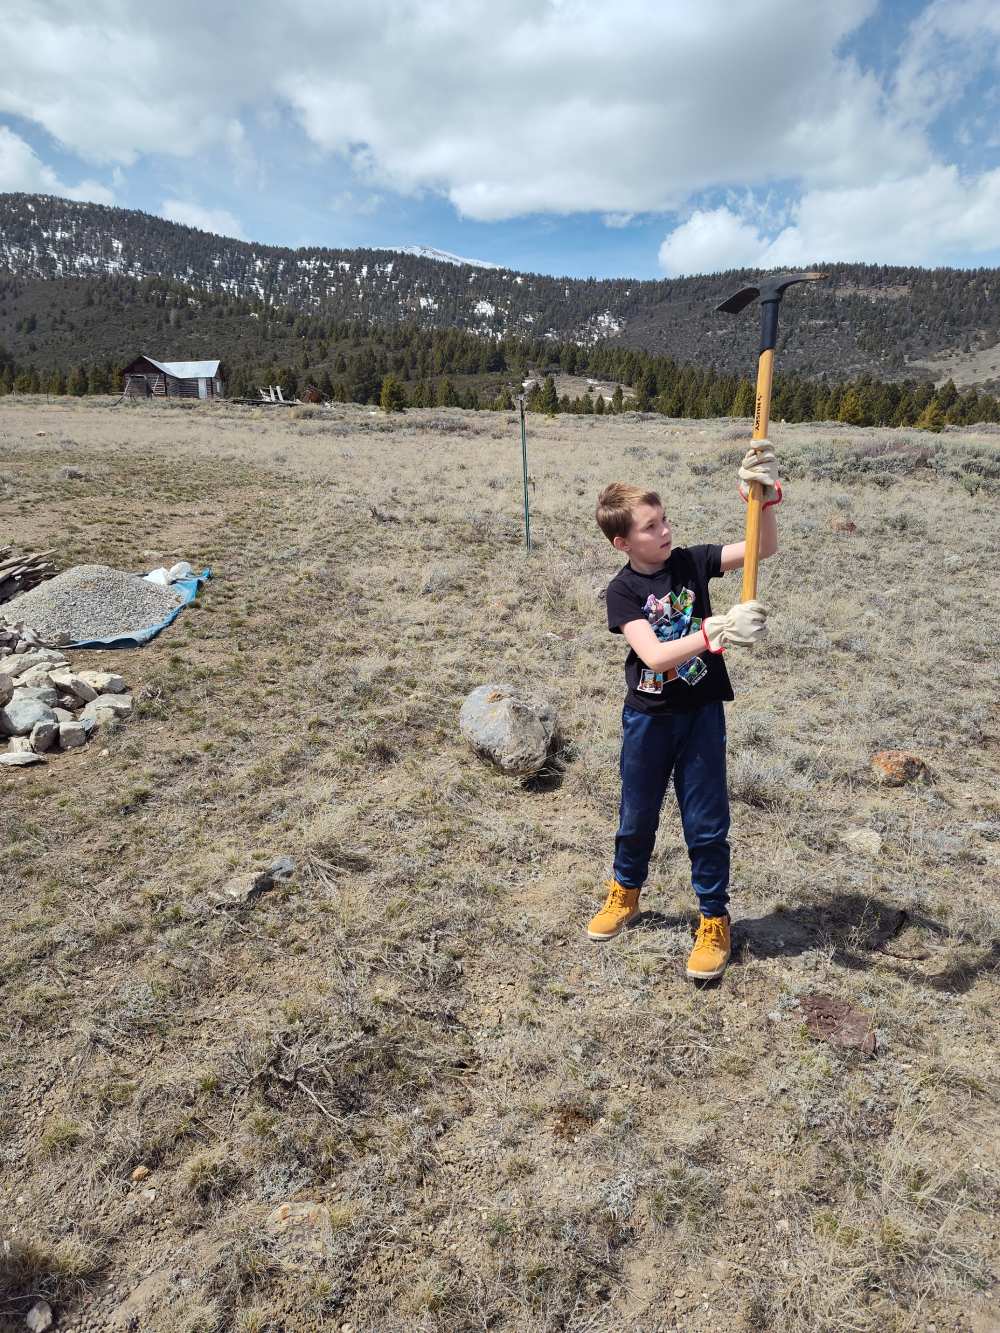
^ Above: Here is Jackson officially breaking ground for the outhouse. Unfortunately, we had to move the outhouse a few feet to the right because of a cluster of big boulders just under the top soil.
^ Above: Here is a photo showing the progress of the hole after the very first day. Tiffany dug most of this hole.
^ Above: On the second day of working on the outhouse, we began constructing the base of the structure. It was built on two skids to allow for easy relocation.
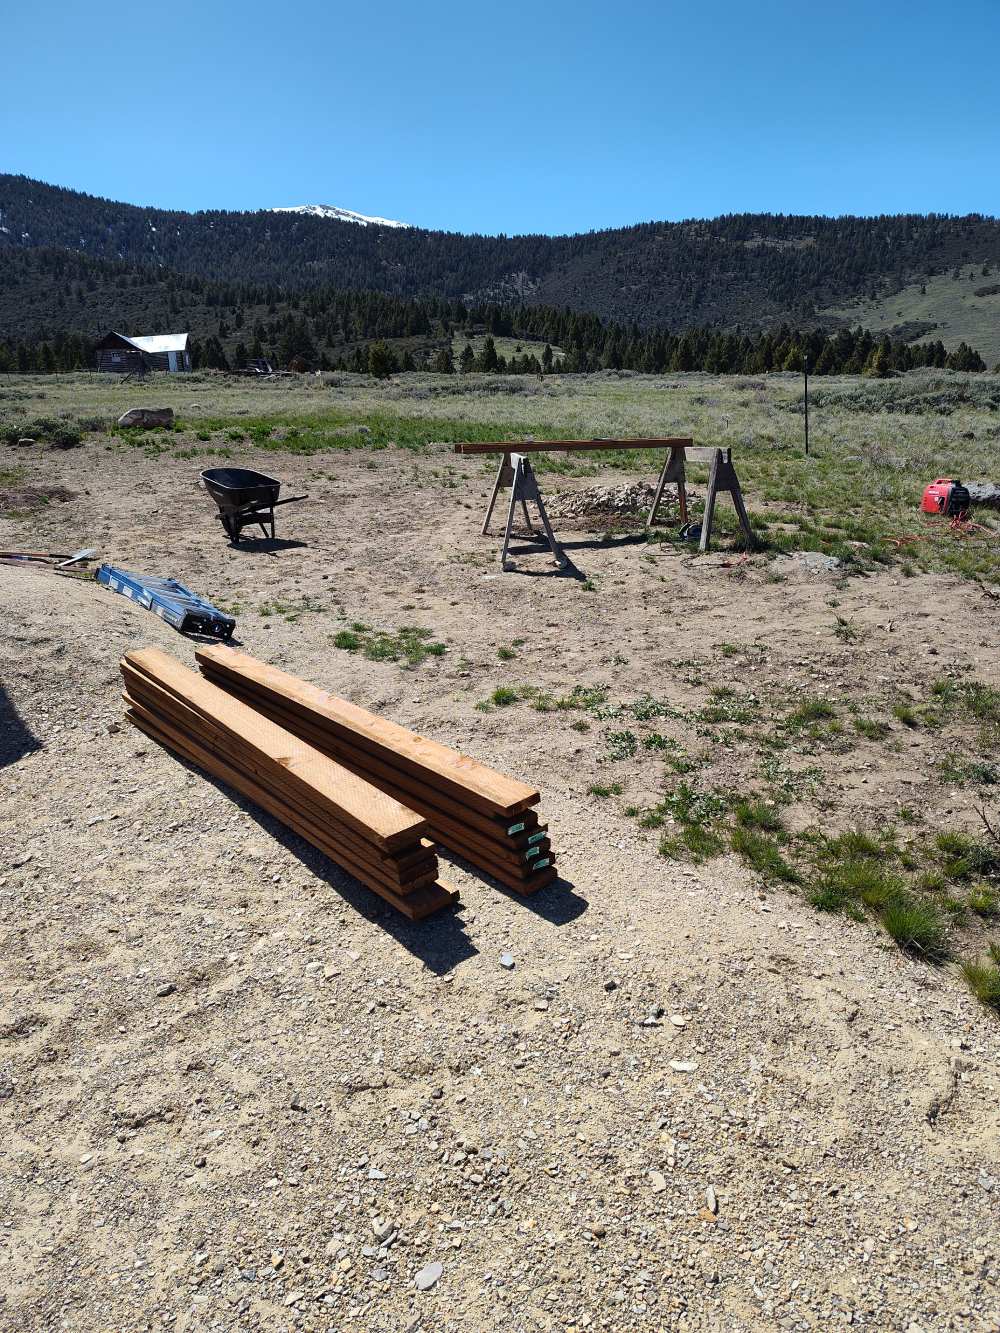
^ Above: I used 2x6" pressure treated lumber for the base. I had to dig into the ground to get the saw horses level. I can't wait to build a workshop :/
^ Above: Here shows one of the "skids" being mounted to the edge of the 2x6" framing. I added the two "skids" so that I can drag the outhouse to the next hole once the current one is filled up. I'm hoping to get 10 years out of the structure (before I have to build a new one), and 5 years from this initial hole (before it fills up).
^ Above: Here shows the 2x6" pressure treated frame attached to the two skids.
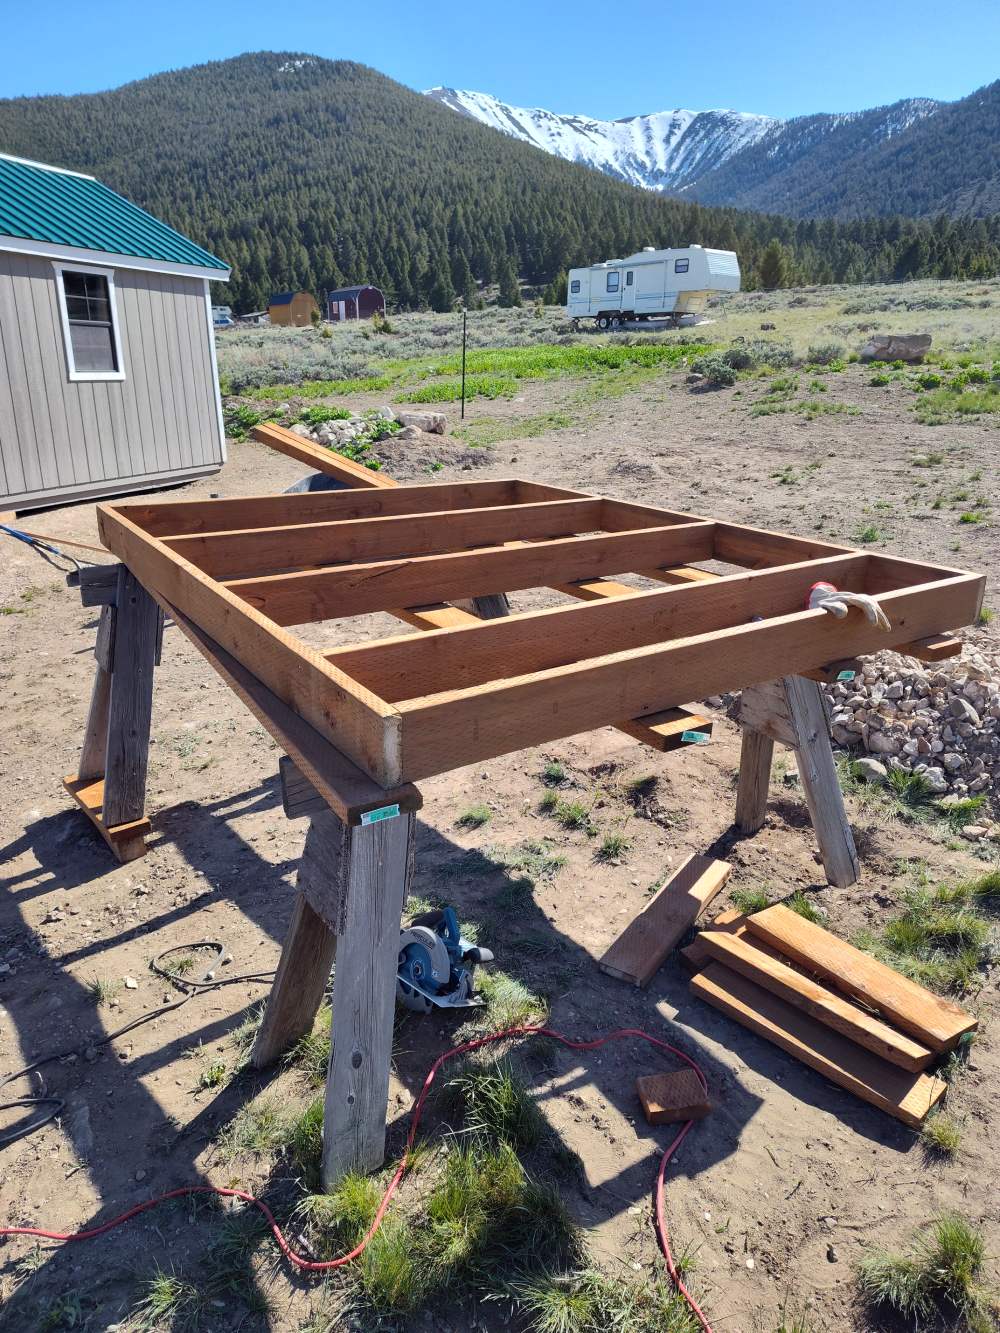
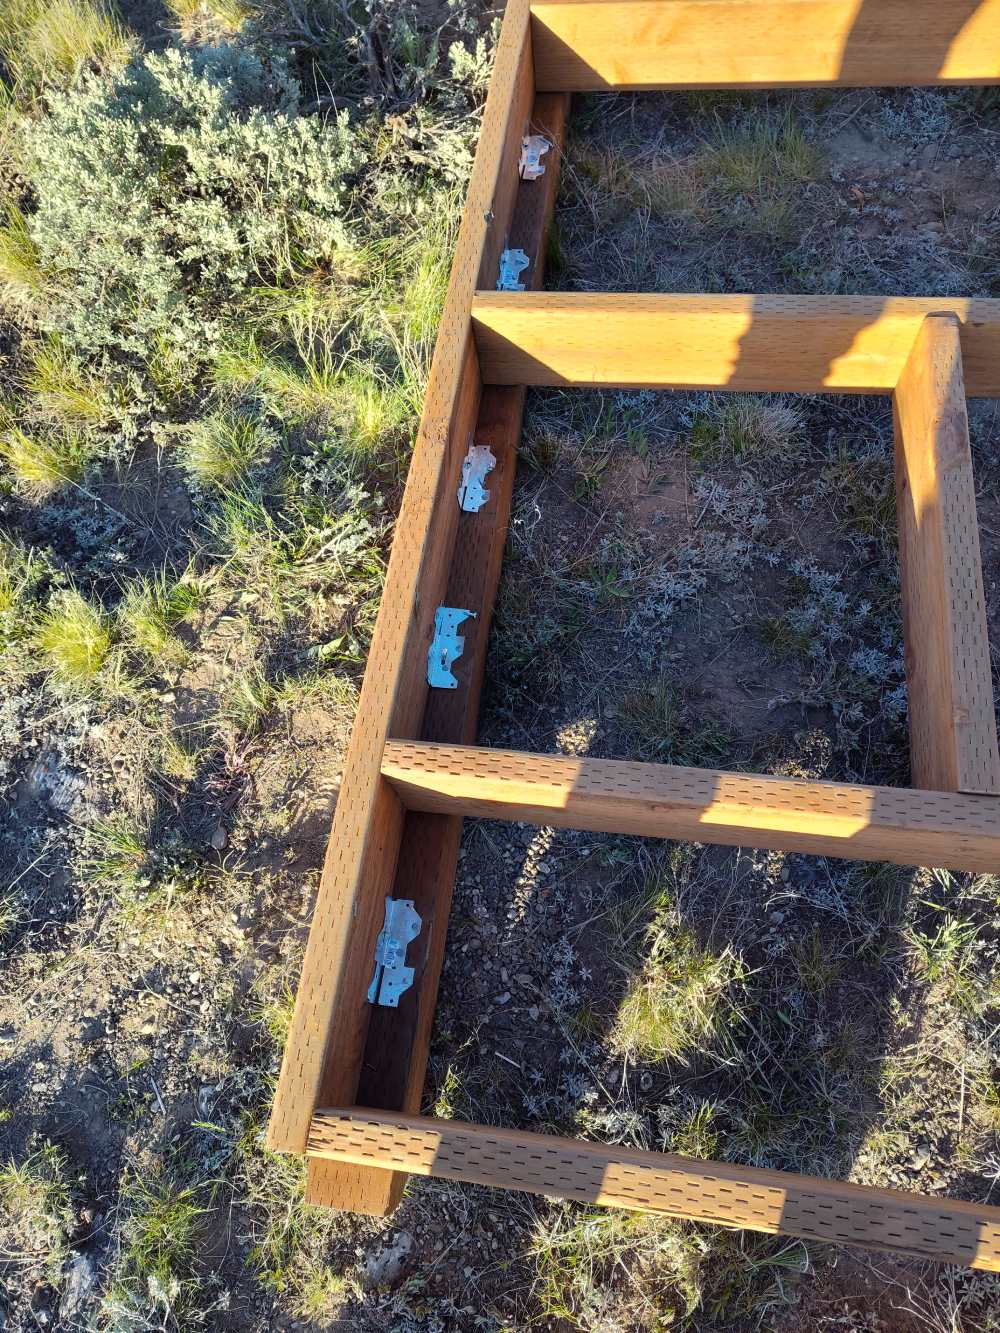
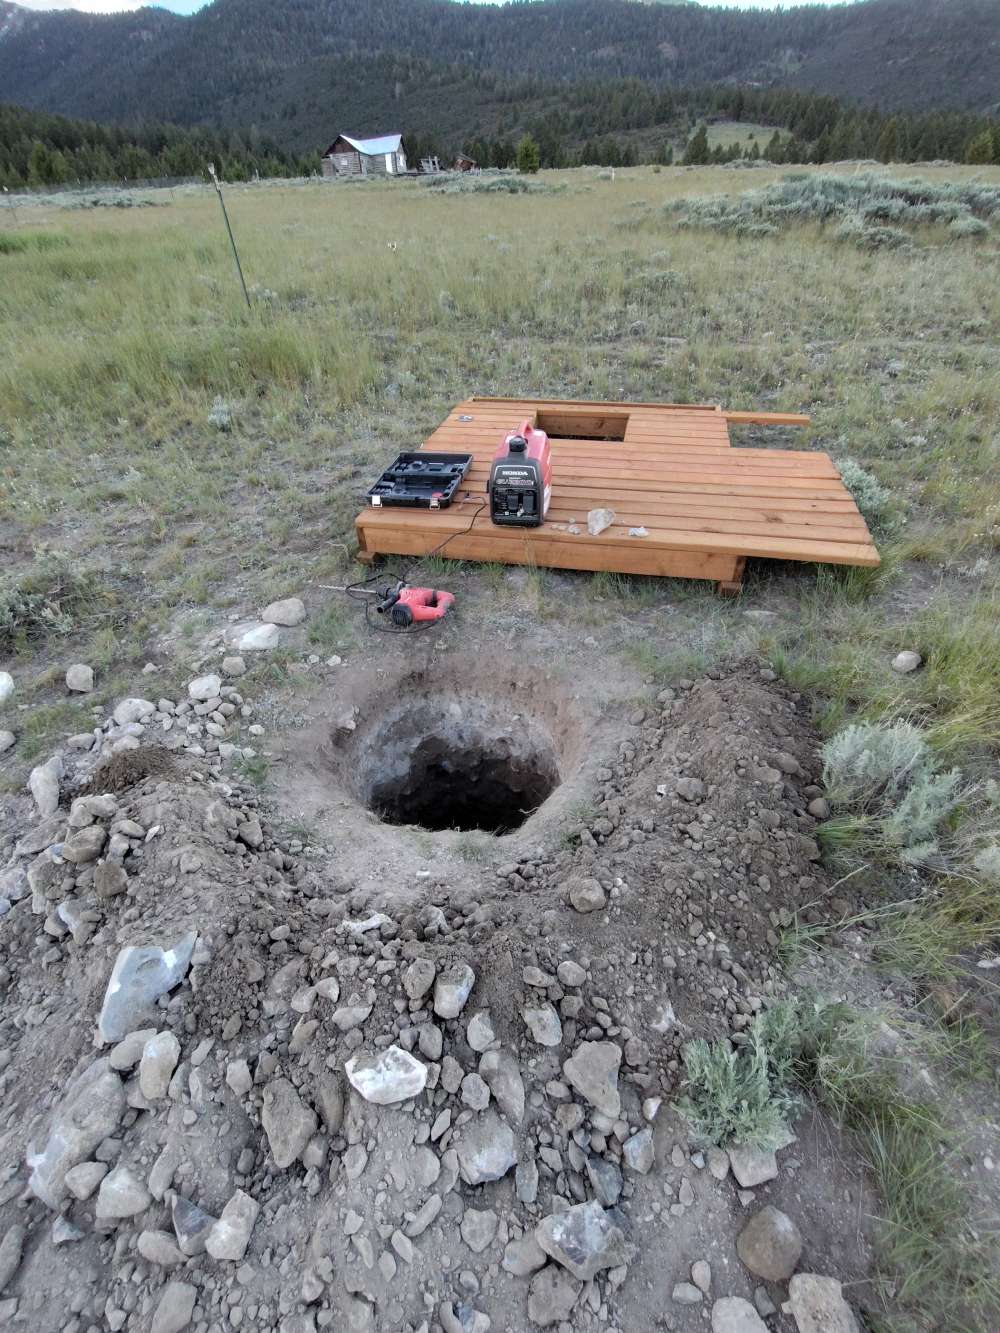
^ Above: After some though, I decided to reinforce the 2x6" frame with some extra studs so that I can mount the actual structure to them later on. This photo also shows the start of the deck being added on.
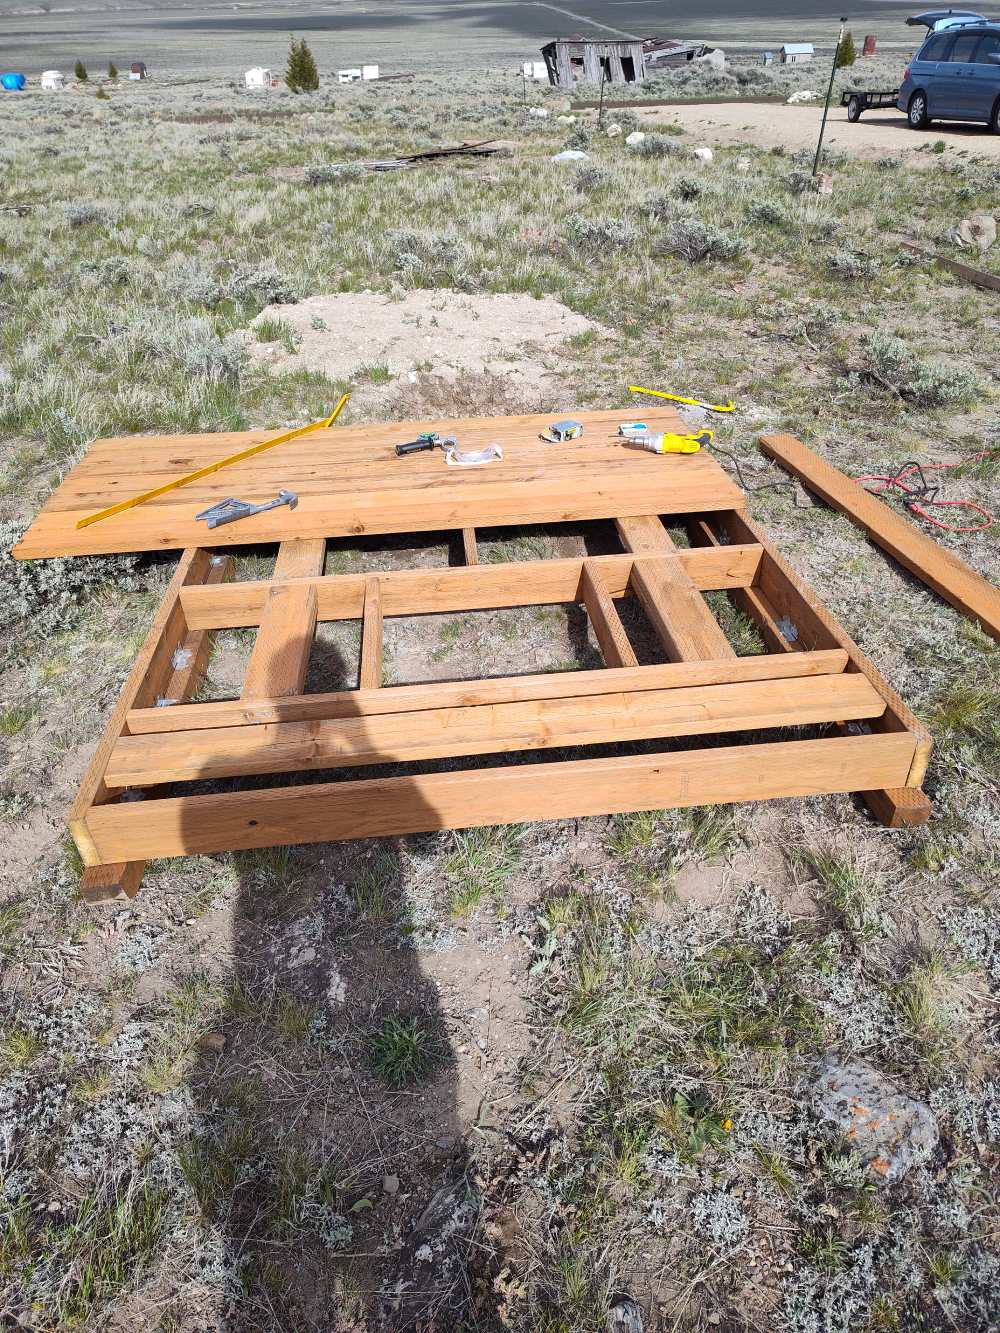
^ Above: this photo shows the progress after about 3 days of work. 2 days spent on the base, and 1 day on the hole.
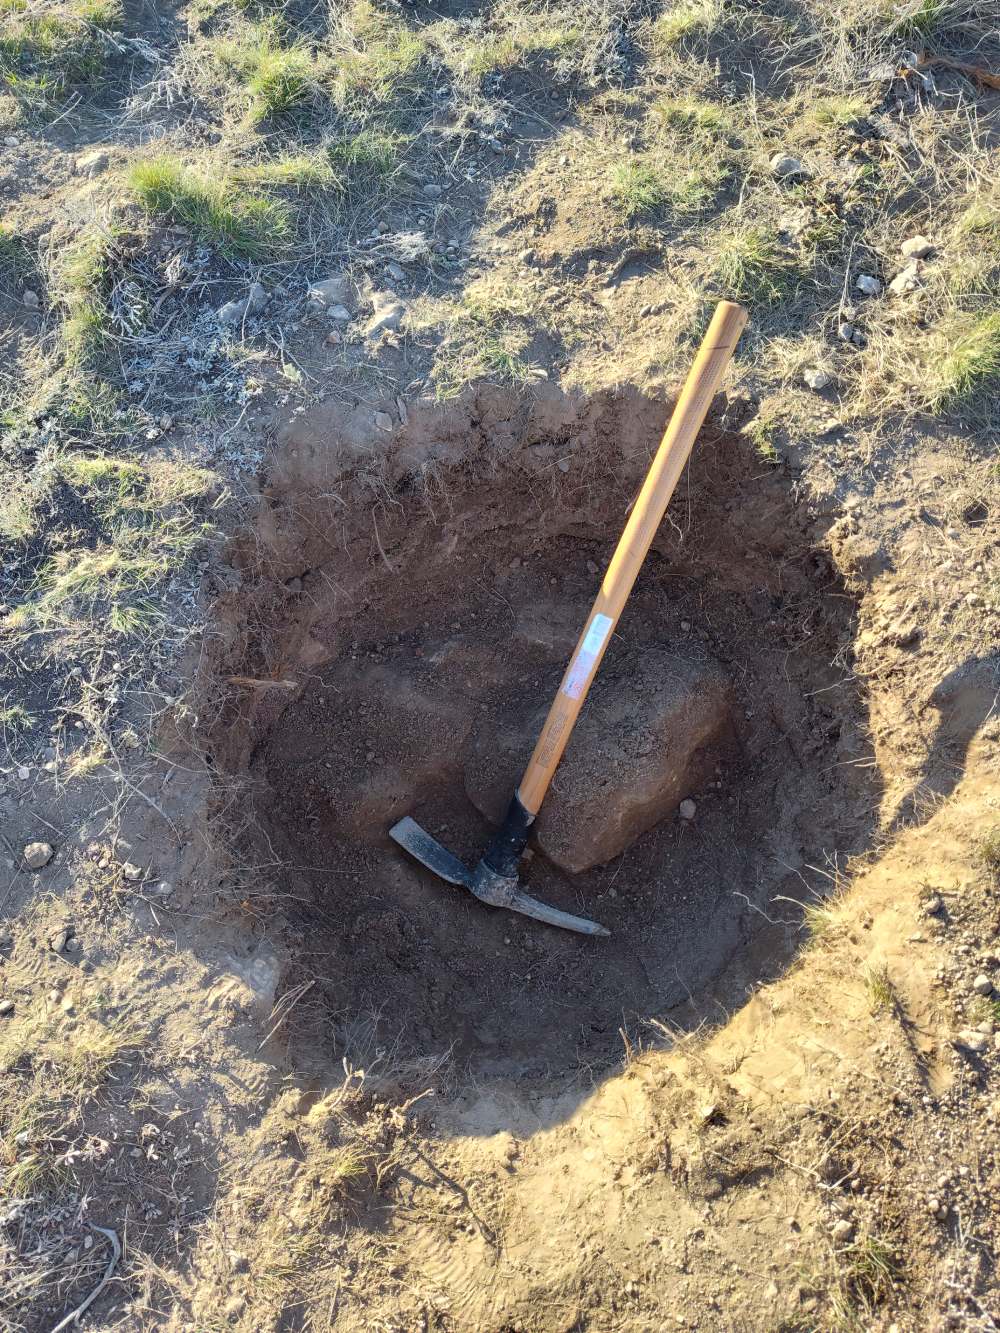
^ Above: The photo above shows just 1 day of work on the hole. Note that the hole has a lot of boulders, which take a while to drill and break though. That hammer drill has been very helpful!
^ Above: This photo shows yet another whole days worth of work on the hole. "Luckily" the big boulders stop around 3' down, and after that its just dirt and rocks. You can see a lot more dirt along the outside of the hole now. Digging after the 3' mark takes a lot less time now.
^ Above: After another whole day of digging, I flatten the top soil around the hole in preparation for the clay dirt. This makes it at least 4 whole days of working on the hole now.
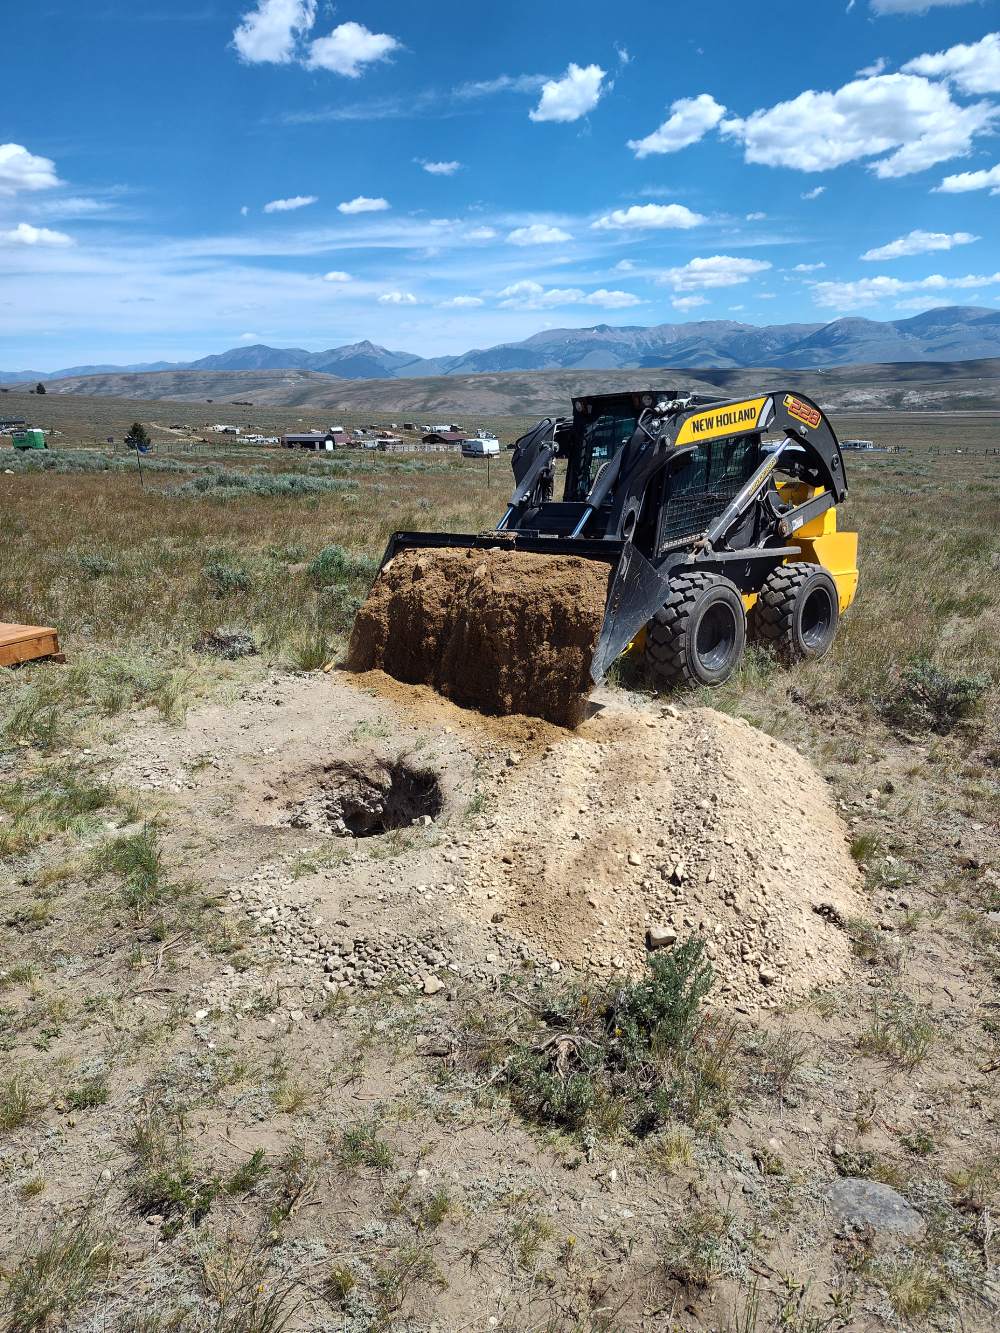
^ Above: One of my Gilmore neighbors was very helpful, and moved a few bucket loads of the clay dirt around the hole for me with his skid steer.
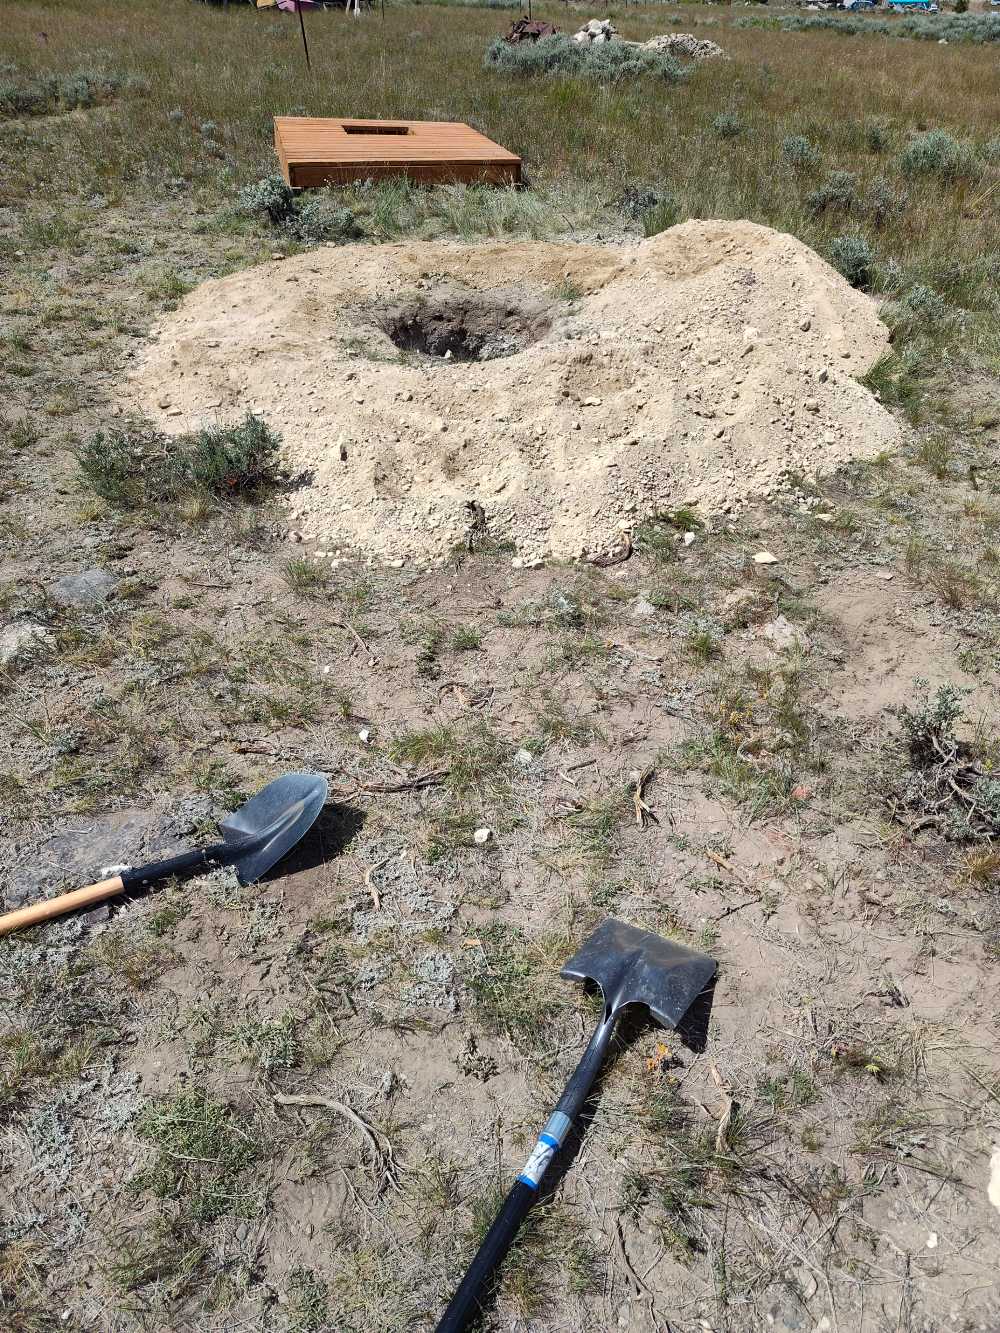
^ Above: I had to move the clay dirt around by hand, well by shovel. Since I am on a slope, the building code says I have to have at least 20" of extra level foundation on all sides of the outhouse. Because top soil is horrible for a foundation, I couldn't the dirt from the hole, thus I have to add the clay foundation. I have to follow the code :/
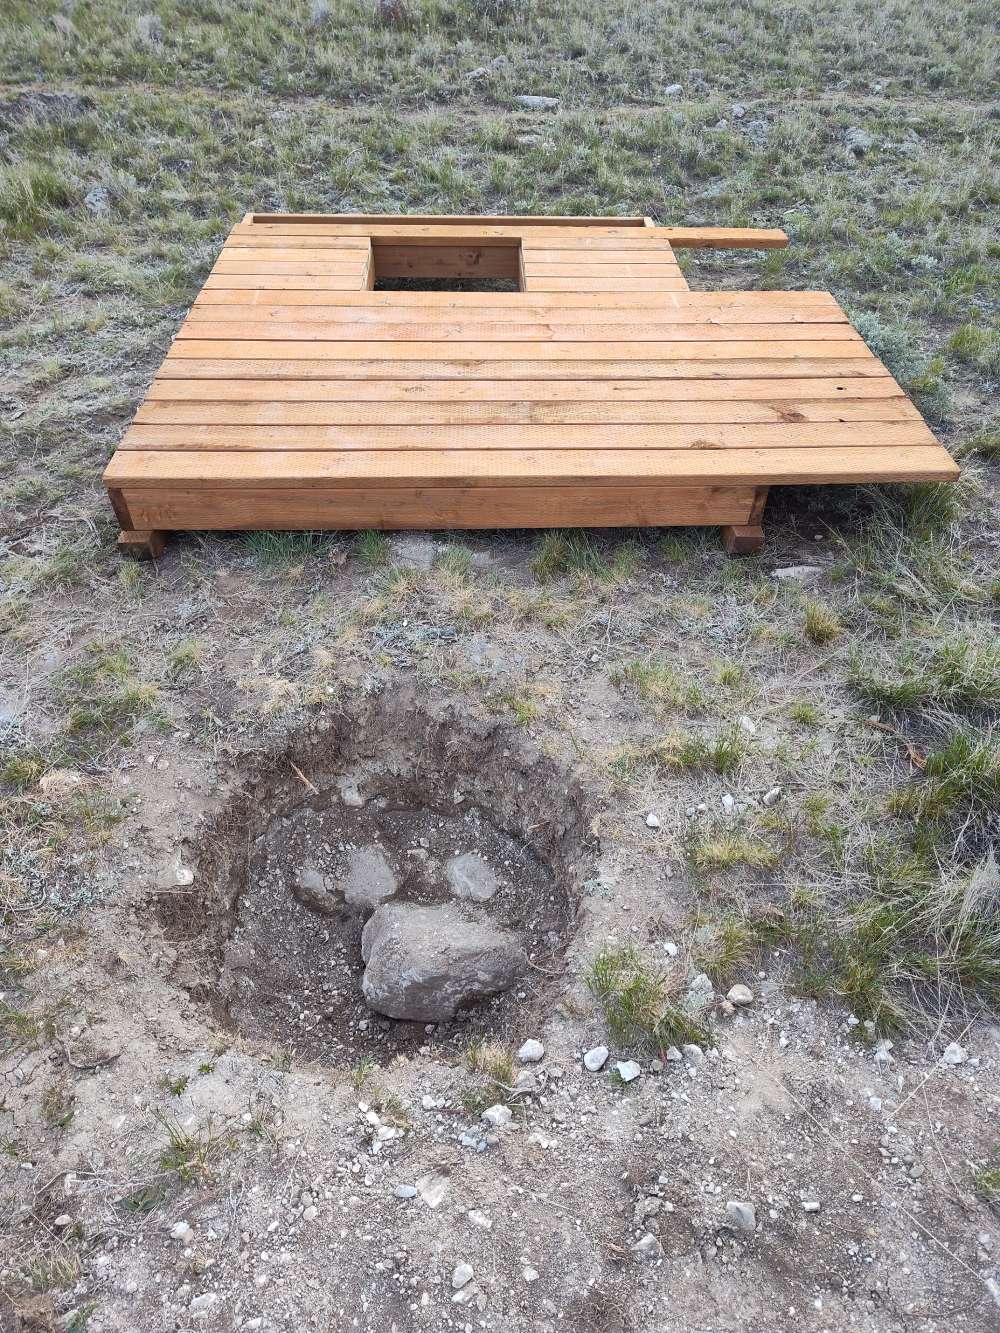
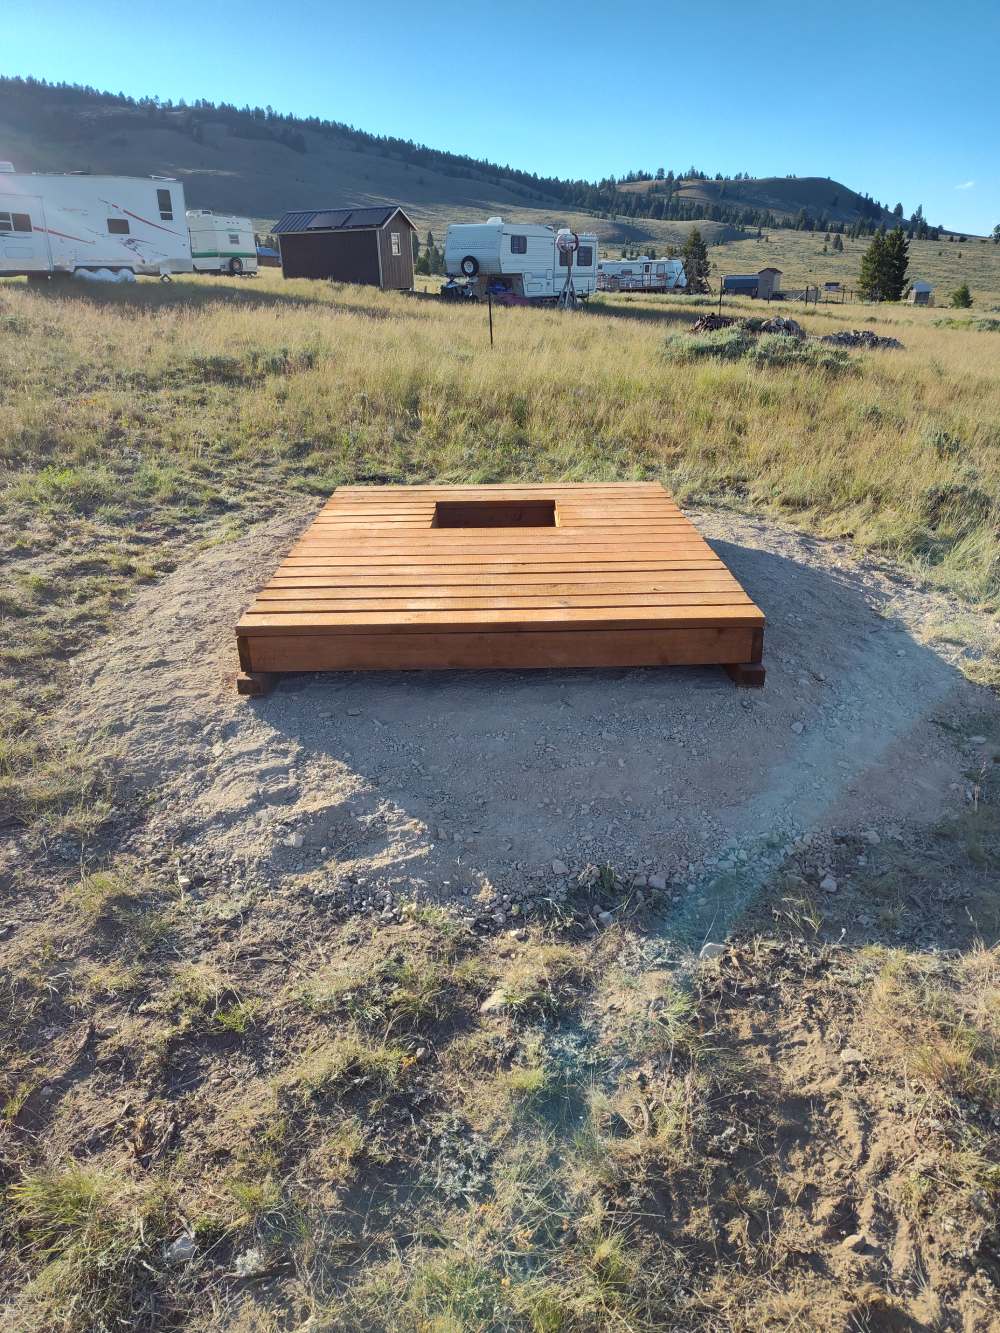
^ Above: After a couple of hours of moving dirt around and leveling out the pad, I moved the base over the hole to see how it looks. Note that I still need more clay to meet the 20" requirement. I have another load ordered.
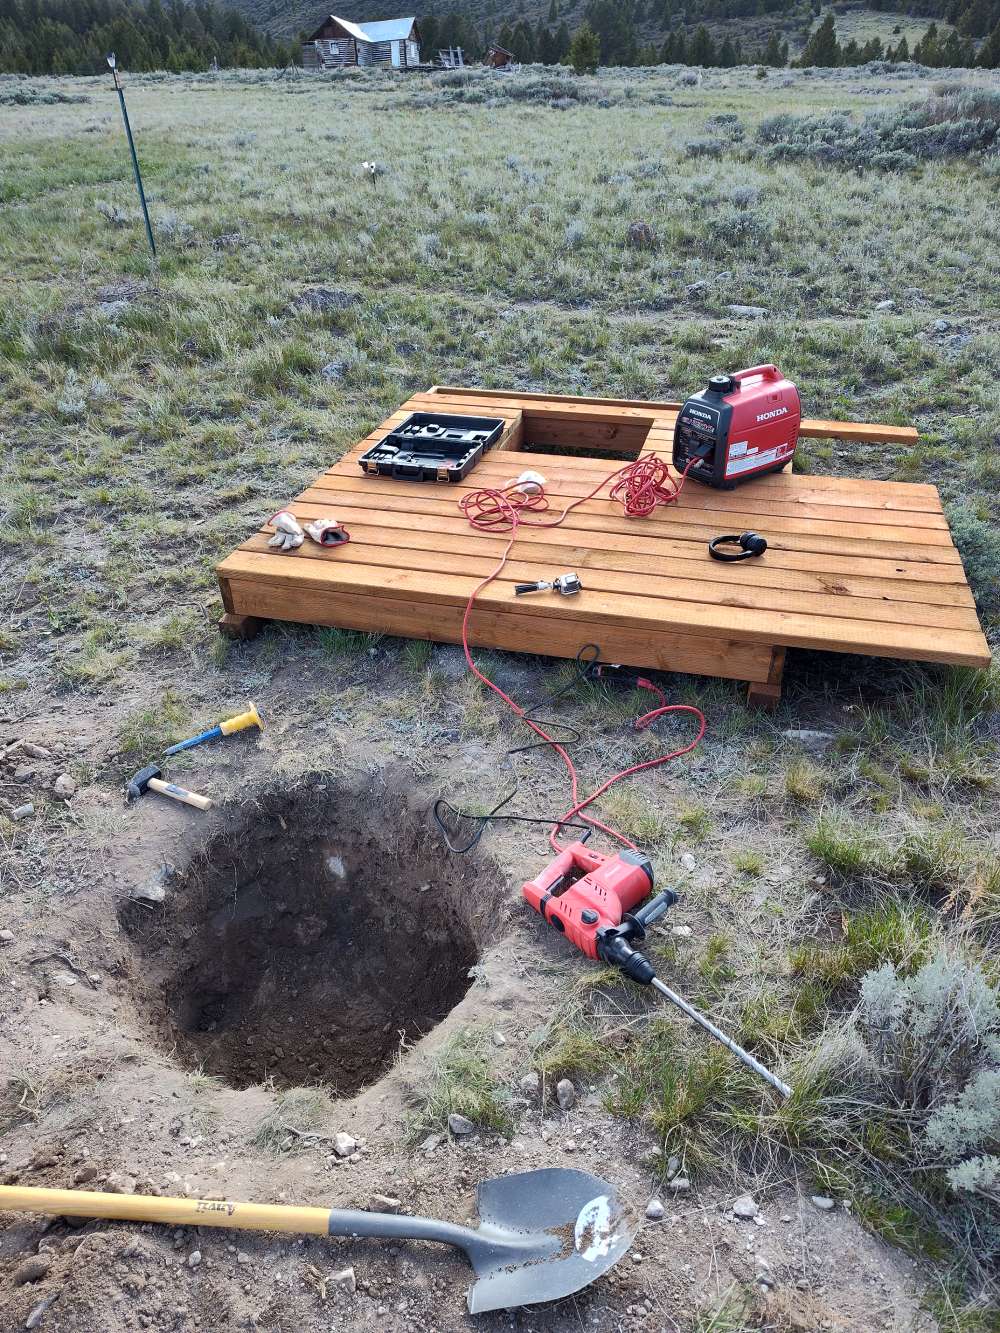
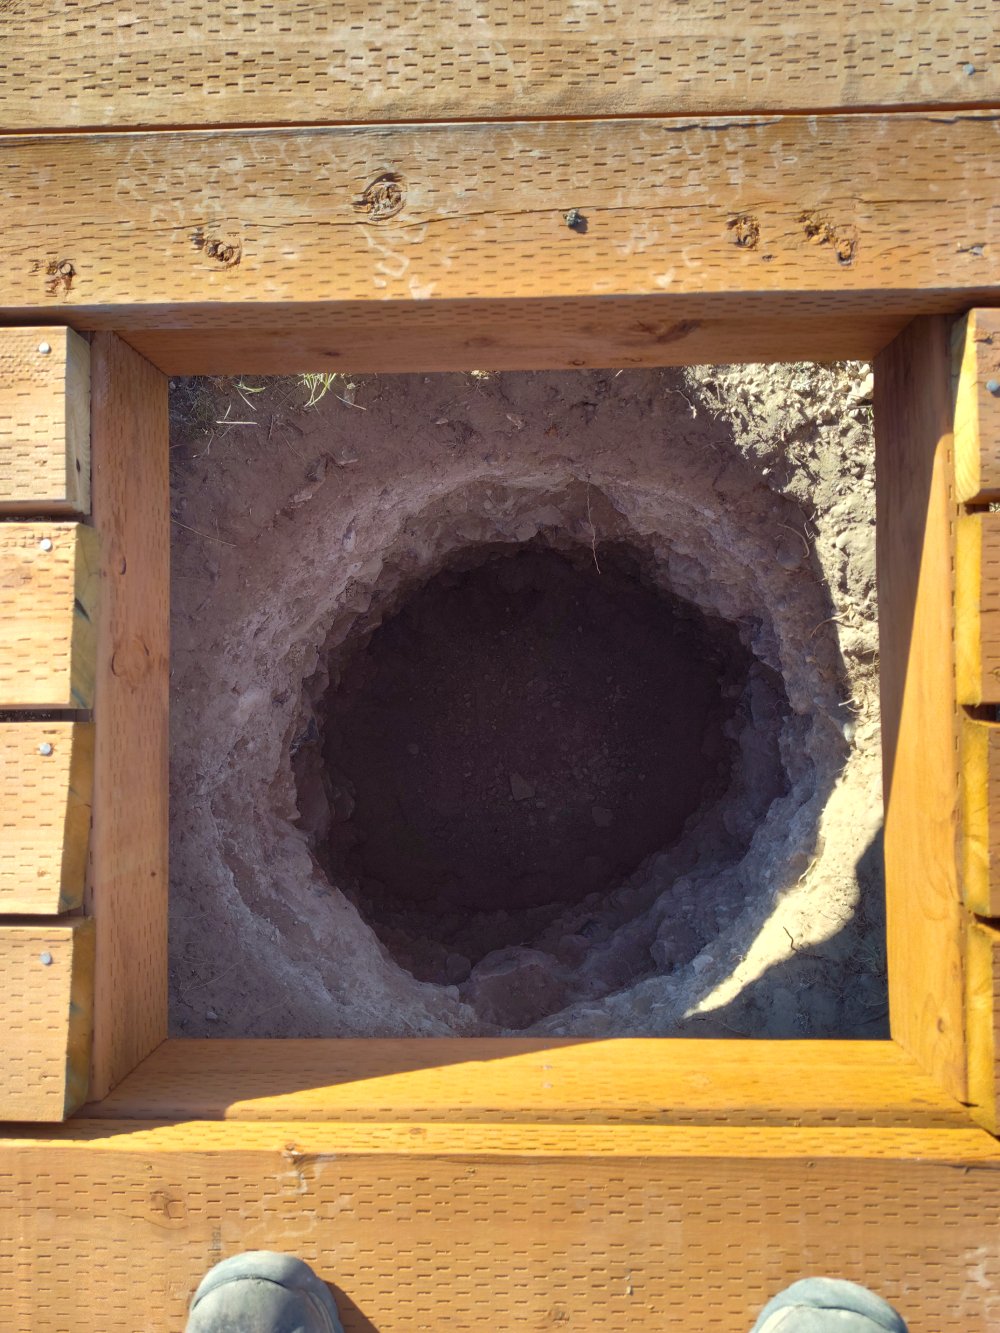
^ Above: Here shows the hole looking down from the outhouse base. I still have a bit of work to do on digging out the hole more.
I hope you enjoyed my update on the outhouse construction. If you have any questions or suggestions at all, please leave a comment. Also if you see something I am doing wrong, also please leave a comment :)
Conversation:
No comments yet. Please contribute to the conversation and leave a comment below.
Conversation:
Ever since building my first website in 2002, I've been hooked on web development. I now manage my own network of eCommerce/content websites full-time. I'm also building a cabin inside a old ghost town. This is my personal blog, where I discuss web development, SEO, cabin building, and other personal musings.